
-
×
 Bafang DPC010 CAN-protokollan näyttö 4,0 tuuman Bluetooth-nopeusmittari Bafangin keskimoottorisarjoille 0-5 tasoa avustava
1 × 136,51 €
Bafang DPC010 CAN-protokollan näyttö 4,0 tuuman Bluetooth-nopeusmittari Bafangin keskimoottorisarjoille 0-5 tasoa avustava
1 × 136,51 €
Välisumma: 136,51 €

Choosing the best bike conversion kit depends on your riding style, desired top speed, wheel size, and how much control you want from your screen.
This guide compares practical options from 500W commuter builds up to 3000W DIY performance setups.
If you are building your first e-bike, this article is designed as a long-form reference: what each component does, how to match voltage and power safely,
when to choose hub vs mid-drive, and what mistakes to avoid before buying.
A conversion kit turns a regular bicycle into an electric-assisted bike by adding a motor, controller, battery system, and user controls.
Most kits include at least:
Advanced kits may include brake cut-off sensors, torque sensors, Bluetooth displays, and integrated lights.
Both options can be excellent. The right choice depends on terrain, budget, and desired riding feel.
Quick rule: for easy installation and good everyday speed, hub kits are often the best start.
For steep hills and performance-oriented riding, mid-drive becomes more attractive.
Rated wattage is only part of the story. Real-world performance also depends on controller current, battery voltage sag, rider weight, wind, tire pressure,
and terrain. Still, power tiers are useful for planning:
A simple way to compare batteries is watt-hours (Wh): Volts × Amp-hours.
Example: 48V × 20Ah = 960Wh.
Higher Wh usually means longer range, but range also depends on speed and assist usage.
Riding full throttle at high speed drains batteries much faster than moderate pedal assist.
For many 500W-1000W builds, a quality 48V battery with sufficient discharge headroom is a practical baseline.
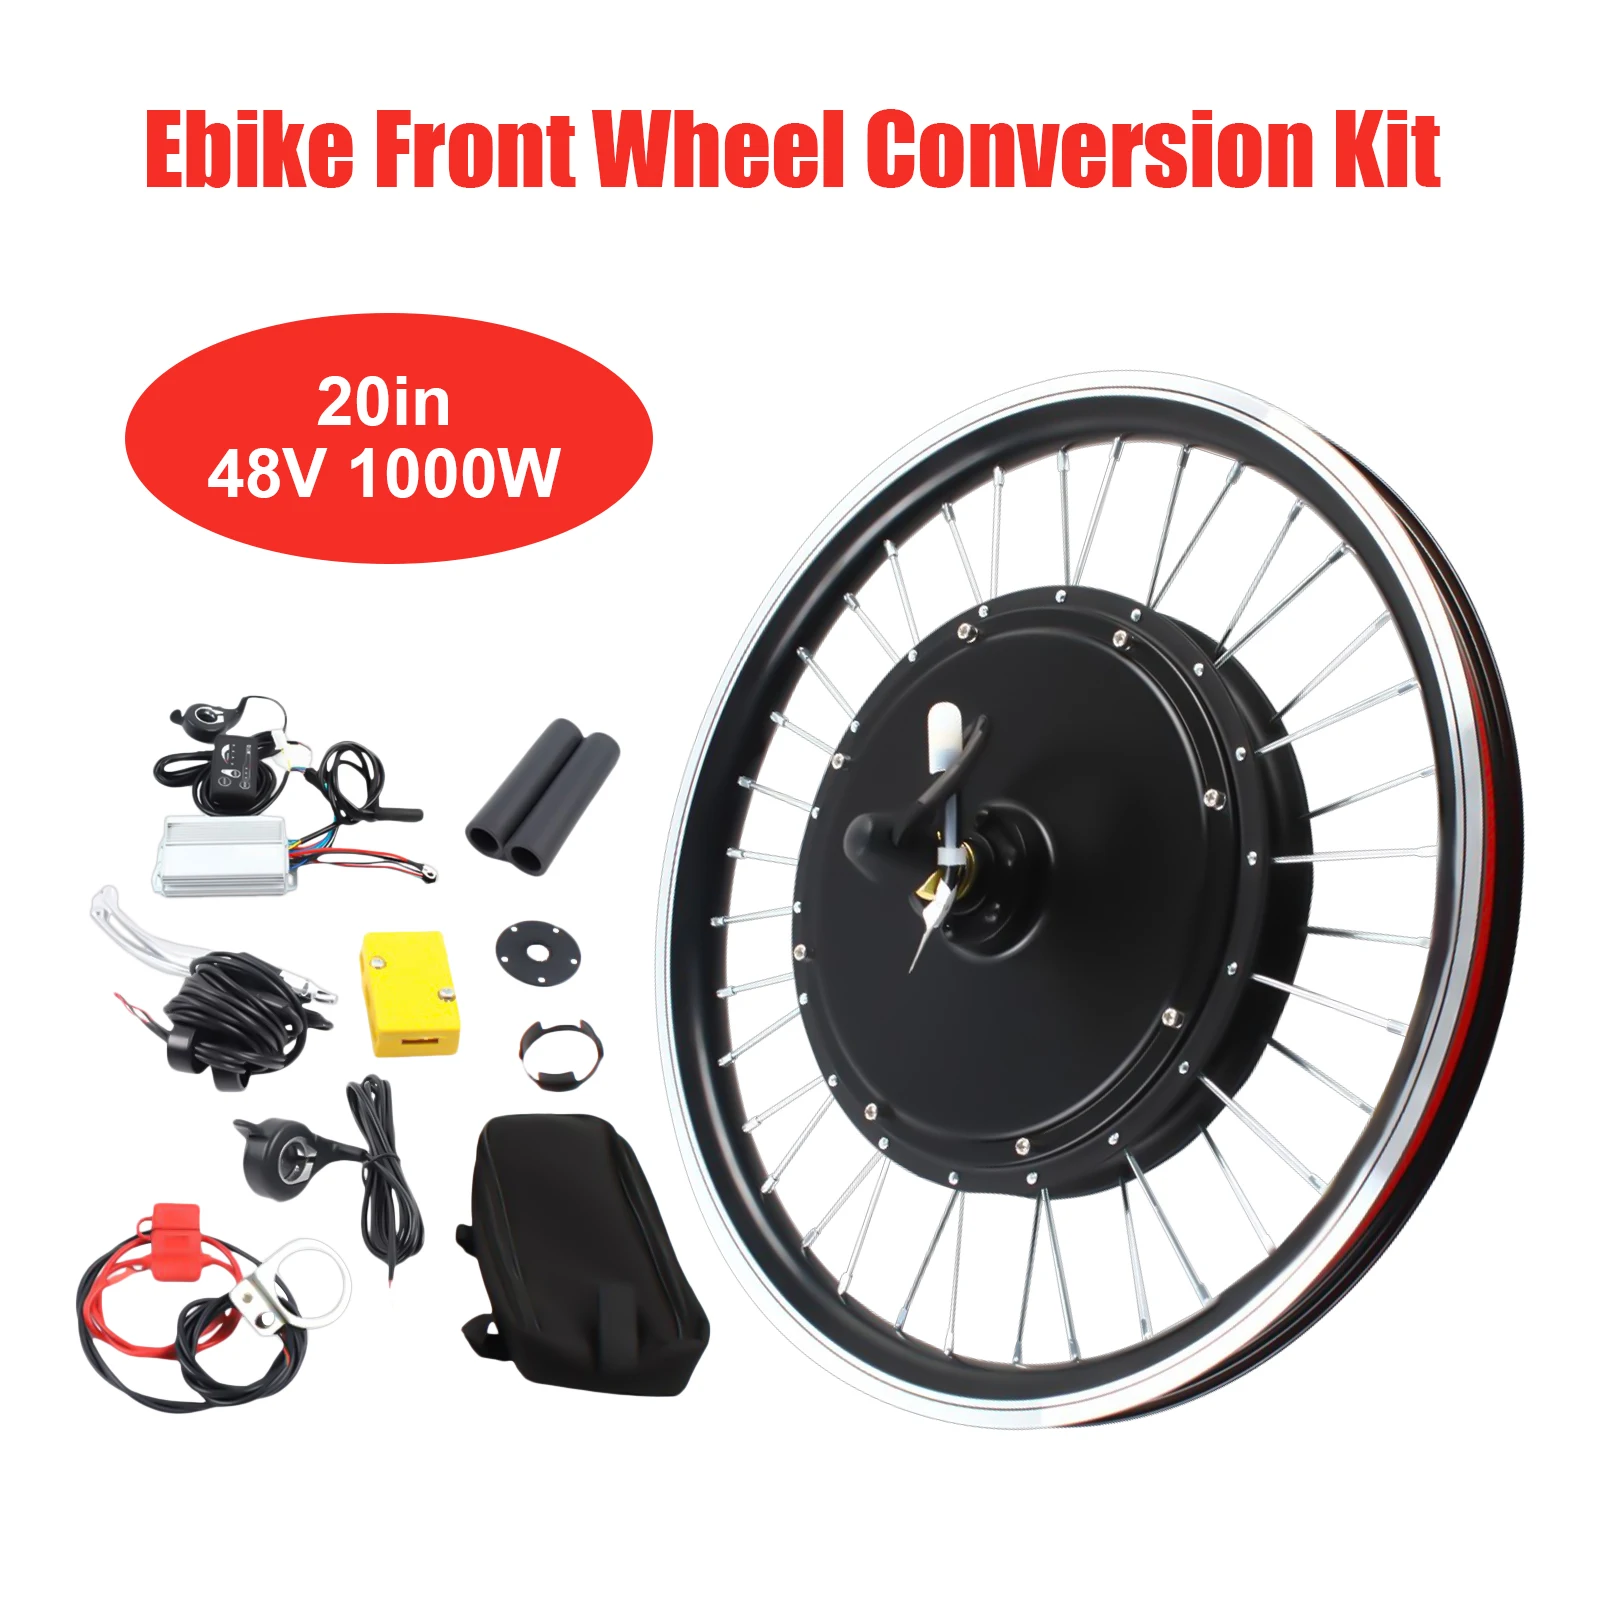
A strong balanced choice is the
20" 48V 1000W Front/Rear Wheel Conversion Kit (SW-810 LED Display).
It is ideal when you want reliable power with straightforward install and a practical display.
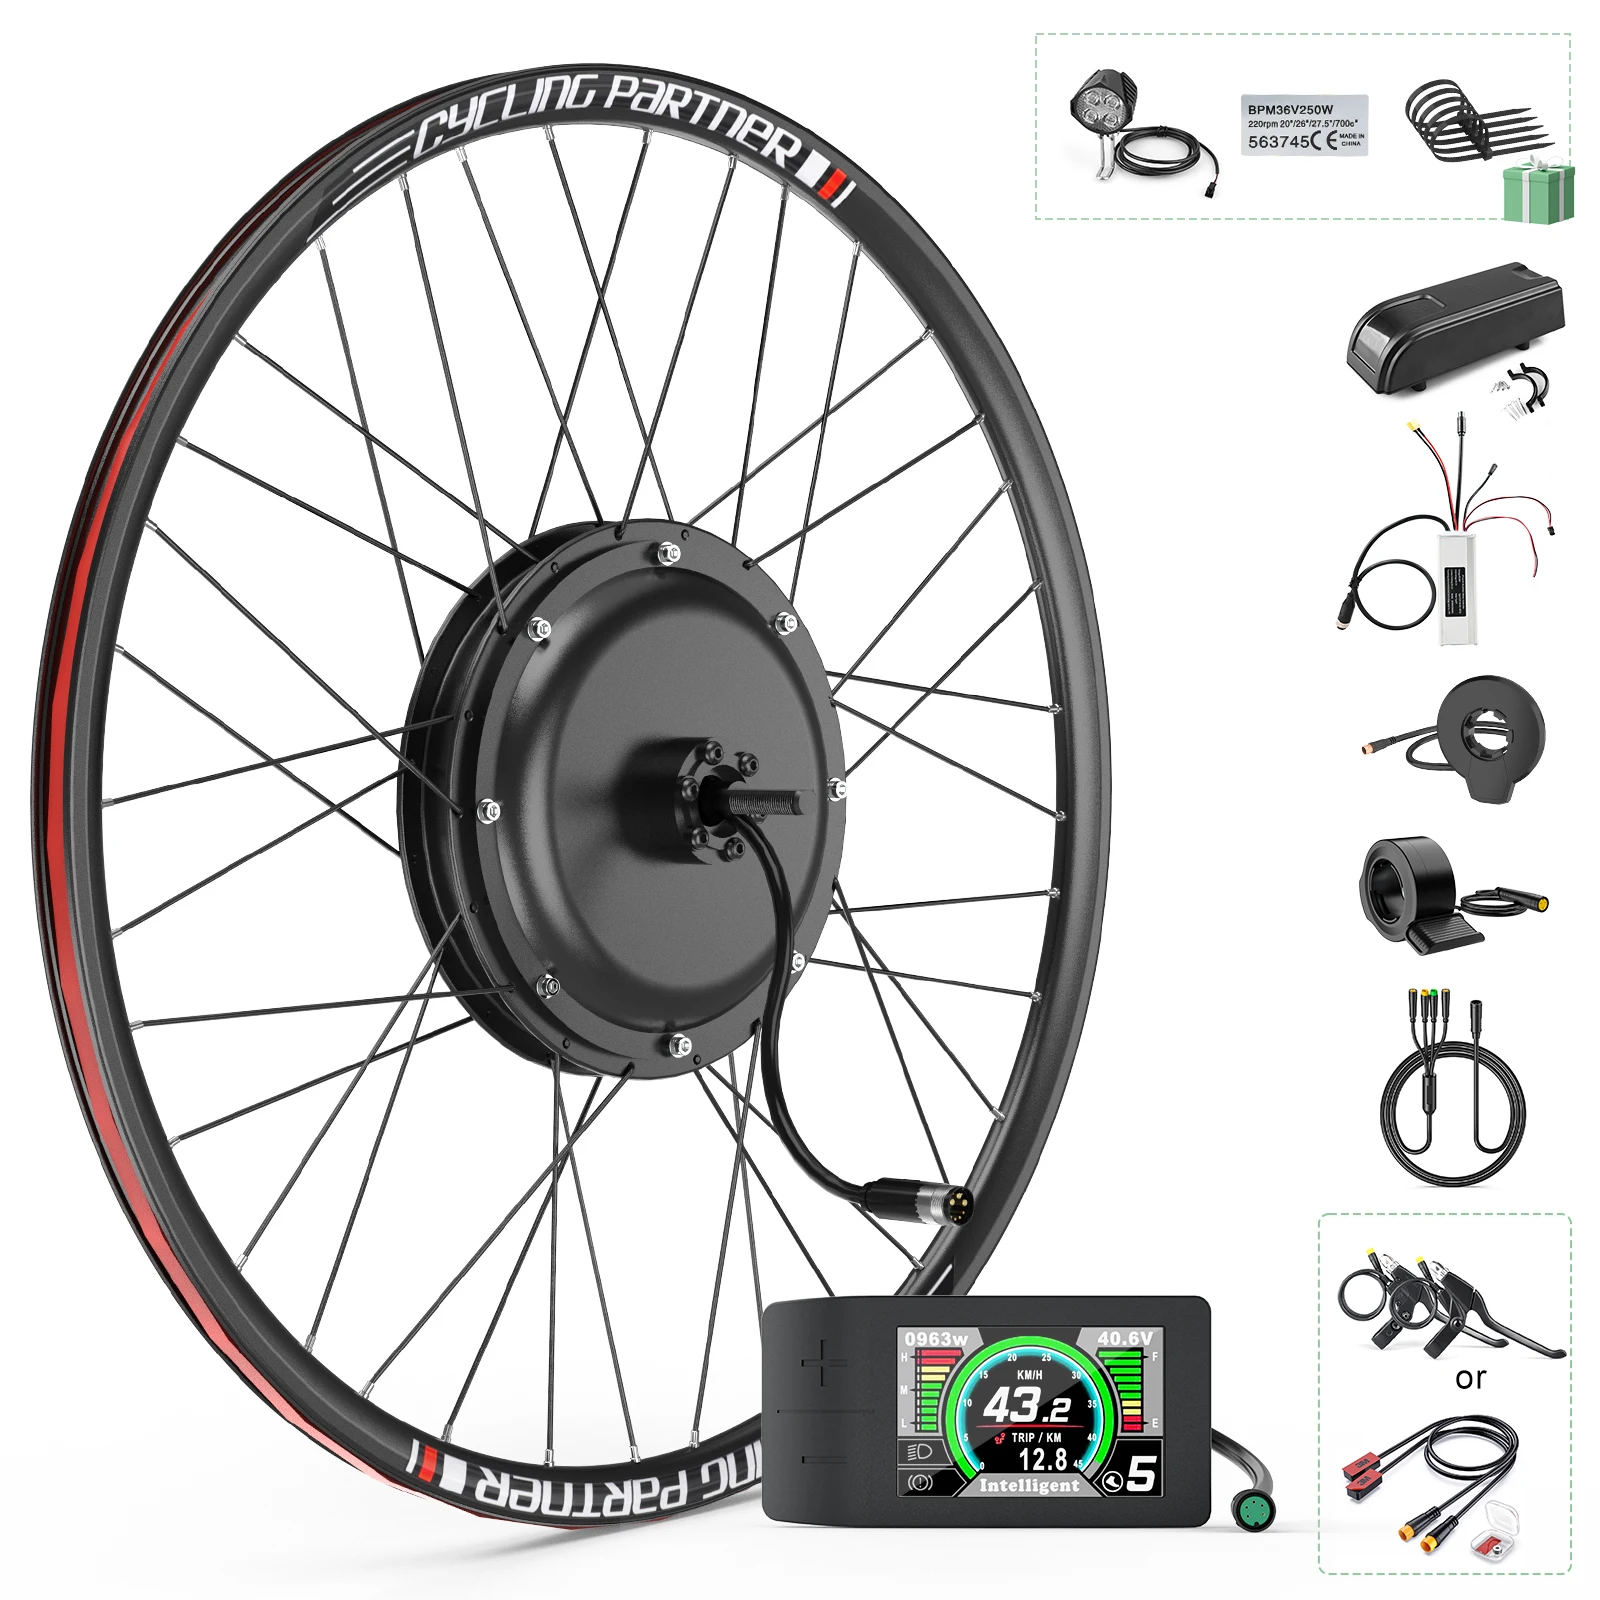
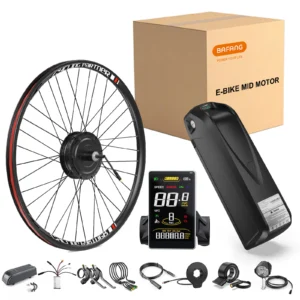
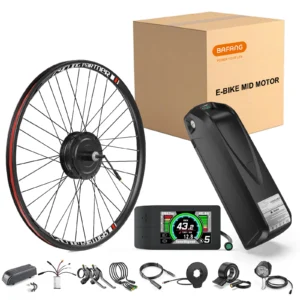
If wheel compatibility is your top concern, start with the
48V 1000W Hub Motor Kit (26", 27.5", 29", 700C).
It gives you a wider fit range while keeping strong everyday torque.
Bafang-based kits are popular because upgrade parts are easier to find later.
Good starting points:
Bafang 500W Hub Kit with Battery
ja
BAFANG 48V Rear Hub Motor Kit (500W/750W).
Choose a high-power kit like
48-72V 3000W Brushless Motor Kit
only if your frame, brakes, controller settings, and battery discharge specs are all matched for performance use.
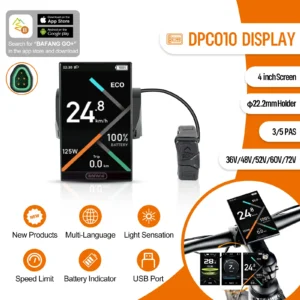
Your display affects daily usability: assist levels, speed readout, diagnostics, and Bluetooth features.
Recommended display upgrades:
Bafang DPC010 CAN Display
ja
Bafang DPC18 / 500C / EKD01 series displays.
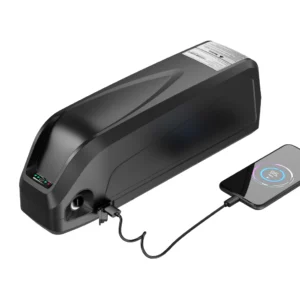
Battery and controller compatibility is non-negotiable. For common 48V builds, this
48V/52V 20Ah Hailong battery
is a practical reference option for 350W-1000W conversions.
Before purchase, always verify connector type, BMS peak current, and mounting dimensions.
A technically compatible battery that does not physically fit your frame can still block your build.
Shop Electric Hub Motor Kits
Shop Electric Mid-Drive Motor Kits
The most common problems are usually wiring and configuration issues, not motor failure.
Build reliability comes from neat cable management, waterproof connectors, and correct controller settings.
For most first-time builders, the best starting point is a 500W-1000W hub motor kit with a simple display, common wheel-size support,
and clear wiring labels. The reason is practical: hub kits typically require fewer mechanical changes than advanced performance builds,
so the install process is easier to debug and maintain. A beginner-friendly setup should also include readily available replacement parts
(controller, display, throttle, harness), because that reduces long-term risk if one component fails. If you are unsure, prioritize
build reliability over maximum power and choose a system that can be upgraded later rather than trying to max out performance in version one.
In many real-world situations, yes, 1000W is enough for hilly routes, especially with a correctly configured controller and healthy battery.
However, hill performance is not based on wattage alone. Rider weight, bike weight, gradient length, tire pressure, cadence, and thermal limits
all matter. A 1000W kit paired with an undersized battery can still feel weak under load because voltage drops quickly. If your route has long,
steep climbs, choose a battery with enough discharge headroom, use conservative controller settings, and focus on heat management. In short:
1000W is a strong all-round tier, but system matching determines whether that power is usable and consistent.
You do not need a “special” battery brand, but you do need the correct electrical specification. At minimum, battery voltage must match the
controller target, and the BMS continuous/peak current must support real motor demand. Capacity also matters: a high-power kit with a tiny battery
may work for short tests but will suffer from range loss and voltage sag during normal use. Beyond electrical specs, confirm physical fitment
(mounting rail, case dimensions, connector type) and cable quality. A good 1000W setup is less about marketing labels and more about proper
matching between voltage, current capability, and actual ride profile.
No, and this is a common source of build frustration. A display must match controller protocol (typically CAN or UART), connector pinout, and
firmware expectations. Even when plugs look similar, communication can fail if protocol families differ. In practice, the safest path is to use
display models known to be compatible with your exact controller platform, then verify assist levels, error reporting, and speed readout in a
no-load test before road use. If you are upgrading displays, treat it like a component migration: confirm protocol first, then connector map, then
parameter support.
Both can be upgraded over time, but they evolve differently. Hub systems are often easier to maintain and replace piece-by-piece, making them great
for gradual, low-risk upgrades. Mid-drive systems can deliver better climbing efficiency and drivetrain feel, but may require more planning around
compatibility and wear. If your goal is a long upgrade roadmap, prioritize ecosystem strength: parts availability, known display/controller options,
and community troubleshooting documentation. A platform with abundant replacement components usually wins over a slightly higher spec kit with scarce support.
A first-time clean install usually takes several hours for a standard hub setup and longer for advanced or custom builds. Most delays do not come from
bolting parts on; they come from routing cables cleanly, checking connector compatibility, securing battery placement, and validating controller/display behavior.
The best way to reduce total time is to pre-plan mounting points, cable paths, and test order before tightening everything permanently. Plan for a staged process:
dry-fit, electrical validation, then final cable cleanup and torque check. This approach reduces rework and improves long-term reliability.
The biggest mistake is buying by wattage headline only. A build can have “big power” on paper but still perform poorly if wheel size, dropout spacing,
display protocol, battery current capability, and connector fit are mismatched. A close second mistake is skipping test stages and jumping directly to a full
assembly without validating each subsystem. The safer workflow is simple: confirm compatibility first, build around a balanced power target, run controlled tests,
then finalize cable management and settings. Reliability and compatibility beat raw spec numbers every time.
For most riders, a 48V 750W-1000W kit with a quality display and correctly matched battery is the best balance of power, usability, and reliability.
Use 3000W setups only for intentional high-performance projects with proper supporting hardware.


![[ALE] Sähköpyörän näyttö BAFANGin keskimoottorisarjalle, napamoottorisarjalle, DPC18 500C, P860ML, DZ40, EKD01, Bluetooth, tietokone, UART-protokolla](https://www.electricstore.eu/wp-content/uploads/2025/05/kf-S3301a7472af34c0f840481bf5fa168a8B-300x300.webp)